If you’re the parent of a young baseball player who is eager to get stronger and faster, you’re already ahead of the game. Strength and conditioning are key components of a young athlete’s development, and having the right at-home equipment can provide the tools necessary to improve performance while reducing injury risk. You don’t have to look far in today’s world of high performance athletics to see how the right training approach can elevate an athlete’s game.
So, let’s break down the top three pieces of equipment that every young baseball player should have for their at-home training. These recommendations are based on functionality, versatility, and their ability to develop the key physical attributes that translate to success on the field. We’ll also highlight specific equipment from Rogue Fitness, a brand known for high-quality, durable strength training gear.
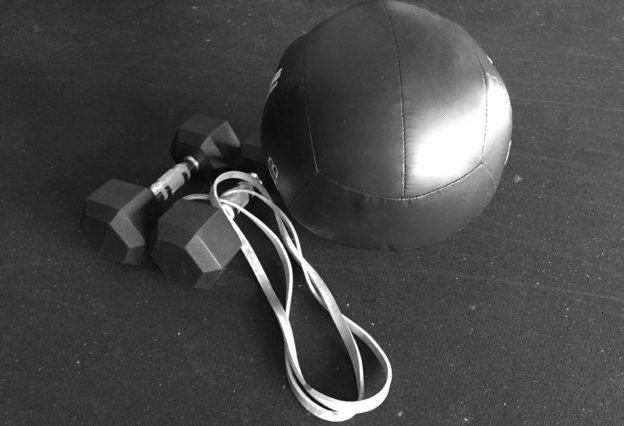
1. Dumbbells: The Cornerstone of Strength Training
Why Dumbbells?
Dumbbells are one of the most versatile tools for strength development. Unlike barbells, they allow for a greater range of motion and require more stability, which enhances coordination and muscle activation. For baseball players, dumbbells can be used to improve:
Core strength and rotational power (Russian twists, wood chops, farmer carries)
Key Benefits for Baseball Players
Baseball is a sport of rotational power, speed, and stability. Dumbbells allow players to train unilaterally (one side at a time), which is crucial for fixing muscular imbalances. They also help build grip strength, which directly translates to better bat control and throwing mechanics.
Recommended Equipment from Rogue Fitness
For young athletes, adjustable dumbbells are a great option because they allow for gradual progression without needing multiple sets of weights. The Rogue Loadable Dumbbells are a fantastic investment. They use the same high-quality knurling and durability as Rogue’s Olympic barbells but in a compact design. Players can start with lighter plates and add weight as they grow stronger.
For those who prefer a more traditional adjustable dumbbell, the PowerBlock Pro Dumbbells, available through Rogue, provide a space-saving solution with easy weight adjustments.
2. Resistance Bands: Mobility, Strength, and Injury Prevention
Why Resistance Bands?
Resistance bands are often overlooked, but they are one of the most effective tools for baseball players. They provide constant tension throughout movements, helping to develop strength while keeping the joints safe. Unlike free weights, bands create a variable resistance that mimics the dynamic movements seen in baseball.
Key Benefits for Baseball Players
Shoulder Stability: Bands are excellent for rotator cuff exercises and scapular strengthening, both of which are crucial for injury prevention.
Explosiveness: Resistance bands are great for explosive movements like resisted sprints and rotational swings.
Flexibility and Mobility: Stretching with bands improves range of motion and keeps muscles primed for performance.
Recommended Equipment from Rogue Fitness
The Rogue Monster Bands come in various resistance levels, making them ideal for a wide range of exercises. A set of light, medium, and heavy bands allows for progressive resistance training. These bands are excellent for:
Shoulder prehab (external/internal rotations, band pull-aparts)
For an all-in-one package, consider the Rogue Shorty Monster Bands, which offer the same durability in a more compact size—perfect for home use.
3. Plyometric Box: Building Explosiveness and Athleticism
Why a Plyo Box?
Explosiveness is one of the most critical athletic traits for a baseball player. Whether it’s sprinting to first base, reacting quickly in the field, or generating power through the swing, a strong lower body is essential. Plyometric training—jumping exercises that improve speed and power—is a proven way to develop fast-twitch muscle fibers.
Key Benefits for Baseball Players
Enhanced Lower-Body Power: Box jumps, lateral hops, and depth jumps improve explosiveness for running and throwing.
Improved Coordination and Agility: Single-leg jumps and step-ups challenge balance and control, key for fielding and baserunning.
Low-Impact Strength Training: Compared to heavy squatting, plyometrics train power with lower joint stress, making them safer for young athletes.
Recommended Equipment from Rogue Fitness
The Rogue Foam Games Box is an excellent choice for at-home use. This foam plyo box has a soft landing surface and offers three height options (20”, 24”, and 30”) by simply flipping the box, making it a versatile investment as your athlete progresses.
Putting It All Together: A Sample Weekly Routine
Here’s how to incorporate these three tools into an effective strength and conditioning routine:
Day 1: Strength & Power Focus
Dumbbell Goblet Squat – 3×10
Dumbbell Romanian Deadlifts – 3×10
Resistance Band Pull-Aparts – 3×15
Plyo Box Jumps – 4×5
Core: Dumbbell Russian Twists – 3×15
Day 2: Speed & Agility Focus
Band-Resisted Lateral Shuffle – 3×10 yards
Plyo Lateral Hops – 3×8 each side
Single-Leg Step-Ups (Dumbbells) – 3×10 each leg
Resistance Band Sprints – 4×10 yards
Day 3: Upper Body & Rotational Power
Dumbbell Shoulder Press – 3×10
Resistance Band External Rotations – 3×15 each arm
Dumbbell Bent-Over Rows – 3×10
Med Ball Rotational Throws (if available) – 3×8 each side
Core: Band-Resisted Wood Chops – 3×12 each side
Final Thoughts
If your young athlete is serious about taking their baseball performance to the next level, investing in high-quality training equipment is a great step. Adjustable dumbbells, resistance bands, and a plyometric box provide everything they need to begin developing strength, speed, and coordination—all from the comfort of home.
Rogue Fitness offers some of the best equipment on the market, ensuring durability and longevity. Whether your young athlete is just starting or already showing serious potential, these tools will set them up for success on the field.
Train smart, stay consistent, and watch the gains translate to better performance when it matters most!
Baseball, often considered a game of skill and strategy, is equally demanding from a physical perspective. Beneath the surface of calculated decisions lies a sport that requires athletes to possess a unique combination of strength, power, speed, and size. Whether you’re watching a pitcher wind up, a batter take a swing, or an outfielder track down a fly ball, the athleticism on display is a result of years of conditioning and training. But what exactly are the physical demands of baseball? Let’s take a closer look at the specific attributes needed to excel on the diamond.
Strength and Power: The Foundation of Baseball
Strength and power are the backbone of a baseball player’s performance. From the explosive swing of the bat to the quick acceleration on the base paths, the ability to generate force is key. Strength, particularly in the core, legs, and upper body, provides the foundation for many actions in baseball.
Rotational Power: Baseball is unique in that it relies heavily on rotational movements, especially when it comes to hitting and pitching. A batter’s swing is powered by the ability to rotate the hips, core, and shoulders in one fluid motion. This rotational power is not just about brute strength but also timing and coordination. The ability to generate torque—transferring force from the lower body through the core to the bat—allows players to hit with both speed and power.
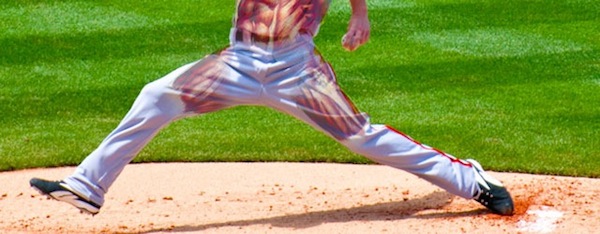
Leg Strength: For both pitchers and position players, lower-body strength is essential. Pitchers rely on powerful legs to drive off the mound, generating velocity and control. Fielders depend on strong legs for quick lateral movements, while base runners need explosive leg strength to accelerate out of the batter’s box and around the bases.
Arm Strength and Accuracy: The Art of the Throw
While leg and core strength are fundamental, baseball is perhaps most famously defined by the arms—whether it’s firing a pitch at 95 mph or making a perfect throw from the outfield to home plate.
Arm Strength: A baseball player’s arm must be powerful yet precise. Outfielders and infielders alike must throw with velocity across long distances while maintaining accuracy. This requires not only upper-body strength but also refined mechanics and coordination between the arm, shoulder, and torso. Pitchers, in particular, develop a finely-tuned arm capable of producing high velocities, while position players focus on being able to quickly release the ball with strength and accuracy.
Accuracy: Precision is equally important. A strong arm is useless without accuracy. Outfielders need to hit cutoff men, infielders need to make pinpoint throws to first base, and pitchers need to locate their pitches with surgical precision. The ability to consistently control the ball under pressure separates the good from the great.
Speed and Agility: Moving with Purpose
Speed in baseball doesn’t only refer to base stealing or sprinting to first base. It encompasses quickness in various movements—whether reacting to a hit ball or moving laterally to field a grounder.
Acceleration: Unlike other sports that may require long-distance running, baseball is more about short bursts of speed. Whether it’s a batter sprinting to beat a throw to first base or a base runner trying to steal second, quick acceleration is key. Players train for these short, powerful bursts with sprint drills and plyometrics.
Agility: Players also need to be agile, capable of reacting quickly to changing situations. Infielders, for example, must be able to move laterally in an instant to field a ground ball, while outfielders need to change direction on the fly to track down a hit. Agility drills, which improve reaction times and quick changes of direction, are integral to baseball training.
Flexibility and Mobility: The Often Overlooked Component
In baseball, flexibility is often overlooked but is just as important as strength and speed. The ability to move through a full range of motion without restriction is crucial to performance and injury prevention.
Shoulder Mobility: Given the repetitive throwing motions in baseball, shoulder mobility is critical, especially for pitchers. Proper flexibility ensures that a player can generate power without placing undue stress on the shoulder, preventing common injuries like rotator cuff tears.
Hip and Thoracic Spine Flexibility: The ability to rotate the hips and upper back is key in both hitting and throwing. Flexibility in these areas allows for smooth, powerful rotations without compensatory movements that could lead to injury. Dynamic stretching and yoga are often incorporated into baseball conditioning programs to maintain this flexibility.
Size: Bigger Doesn’t Always Mean Better
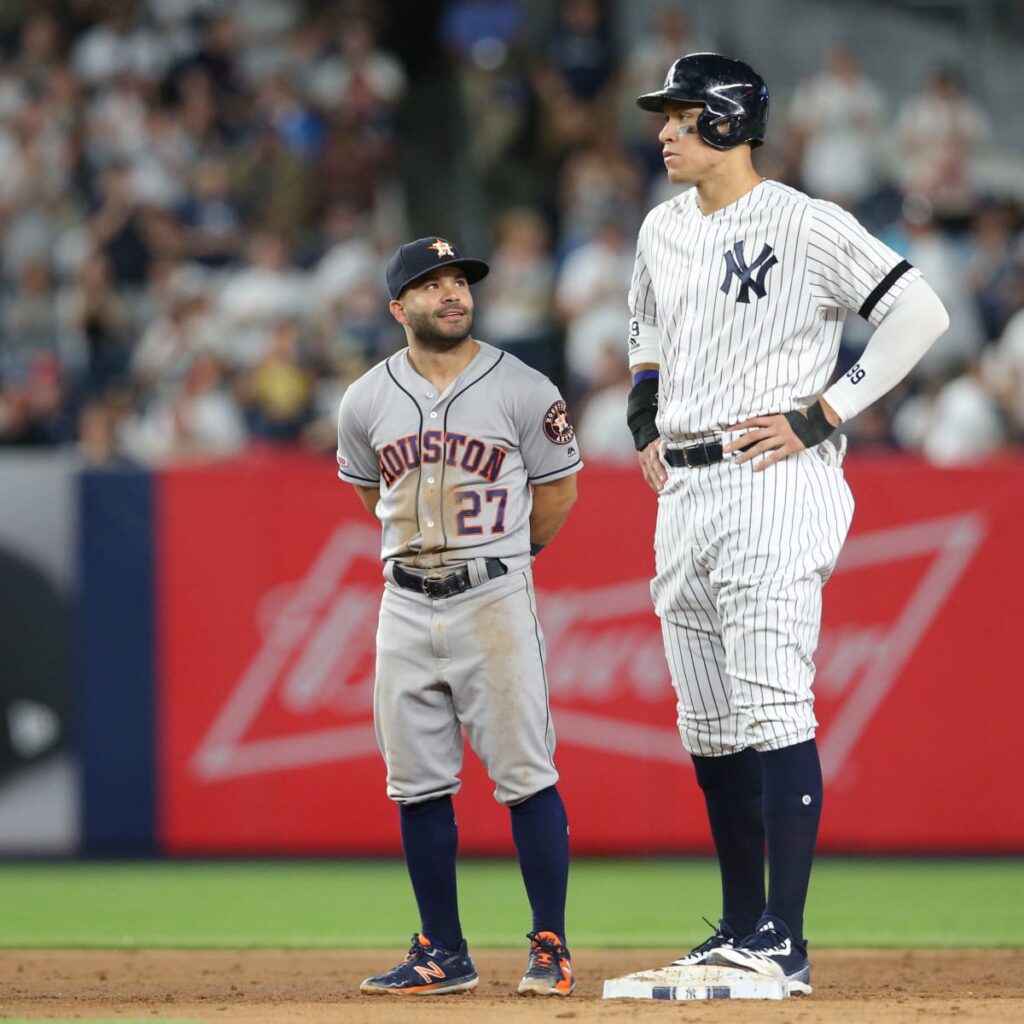
Baseball players come in all shapes and sizes, from power hitters like Aaron Judge to speedy infielders like José Altuve. While size can be an advantage—particularly for pitchers and power hitters—there’s no one-size-fits-all formula in baseball. What matters most is how well players can translate their size into power, speed, and agility.
Baseball players come in all shapes and sizes. There is no one-size-fits-all formula in baseball.
Power vs. Agility: Larger players, particularly in power positions like first base or corner outfield, may focus on generating tremendous power through their size. Meanwhile, smaller players may rely more on agility and speed to make an impact. The beauty of baseball is that it accommodates a wide range of body types, each contributing to the game in different ways.
Intangibles: Skills, Work Ethic, and Mental Toughness
Beyond physical traits, baseball demands a sharp mental edge and an unwavering work ethic. The skills required to excel in baseball are honed through countless hours of practice, but the mental aspects are what often distinguish the elite from the average.
Hand-Eye Coordination: Perhaps the most critical skill in baseball is the ability to make contact with the ball. A batter’s success hinges on exceptional hand-eye coordination, allowing them to track a pitch moving at upwards of 90 mph and connect with it in a split second. This coordination extends to fielding as well—reacting to balls hit at various angles and speeds requires precision and quick reflexes.
Pitch Recognition and Reaction Time: Batting isn’t just about power; it’s about recognizing pitch types—fastballs, sliders, curveballs—and adjusting quickly. Great hitters develop a keen eye for these subtleties, reacting in milliseconds. This mental processing skill, developed over years, can mean the difference between a strikeout and a home run.
Work Ethic: Baseball is a game of repetition and refinement. Success at the plate or on the mound rarely happens overnight. It takes years of consistent practice, from perfecting a swing to refining a pitching motion. Elite players spend countless hours in the batting cage, weight room, and bullpen. That discipline and work ethic separate those who merely play the game from those who master it.
Mental Toughness: Baseball is a game of failure. Even the best hitters in the game fail 7 out of 10 times. Dealing with this level of failure requires mental toughness and resilience. Players must stay focused through slumps, bad games, and long seasons. The ability to bounce back from adversity is essential to success in baseball, whether for a pitcher who gives up a home run or a batter who strikes out with the bases loaded.
Baseball IQ: An often-overlooked intangible is the player’s knowledge of the game. Understanding situations, knowing when to make certain plays, and anticipating what will happen next are critical elements that come from years of experience. Players with high baseball IQ are often one step ahead of the competition, knowing how to read the game and make quick, strategic decisions on the field.
Conclusion
The physical demands of baseball are as varied as the positions on the field. It’s a sport that requires athletes to excel in strength, power, speed, and flexibility, often with specialized requirements for different roles. But beyond these physical traits, it’s the intangibles—mental toughness, skill, and work ethic—that separate the greats from the rest. Whether it’s the rotational power of a batter, the arm strength and accuracy of a fielder, the agility and speed of a base runner, or the mental resilience to push through adversity, baseball challenges the body and mind in complex ways. With its unique combination of athleticism, skill, and intellect, baseball continues to be a game that pushes players to develop both physically and mentally, making it one of the most demanding and rewarding sports in the world.
If you are looking for a baseball off-season workout, then you are in the right place. We have already discussed general guidelines for a baseball training program, and then laid out a sample baseball off-season workout for Phase 1 and Phase 2. If you have not read those three different posts, then I would recommend going back to check them out before continuing.
Now, let’s take a look at Phase 3.
During the first two months of the off-season baseball players need to concentrate on their strength and conditioning and give their throwing arms some time off from throwing. While we recommend not throwing through Phase 3 as well, you can consider starting your throwing program later in the month. Waiting until November will give your arm a full 3 months of recovery from the stresses of throwing a baseball. That’s 25% of the year and can make a huge difference in how you feel and how well your arm “bounces back” when you do pick up a baseball again.
We’ll discuss the specifics of adding in a throwing program more in Phase 4.
Let’s take a look at the overall year again and discuss our goals for Phase 3. As seen below, the training year can be broken down into off-season, pre-season, and in-season segments. Within each season, you can break down the different months into 4 week phases.
Overall goals to keep in mind for the four phase baseball off-season are to recover from the previous season, rehabilitate existing/nagging injuries, and develop a strength and conditioning foundation for the following training year.
Unless injuries were season-ending, any nagging issues should begin to fade by the 3rd month of the off-season. So, for Phase 3 specifically, our goals will be, but are not limited to:
Evaluate Phase 2 and make necessary changes to general strength program.
Progress strength exercises where appropriate.
Upper body pulling exercises should balance out pushing exercises. Depending on the individual, some pushing exercises could be eliminated. Or, plan pulling vs. pushing exercises in a 2:1 ratio.
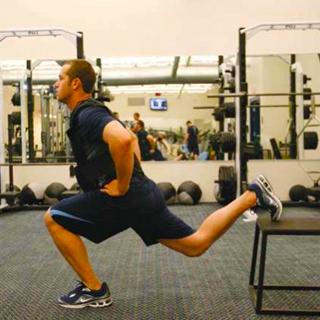
Increase volume of power-based movements such as medicine ball work and plyometrics
Consistently perform soft tissue and flexibility work.
Continue to hold off on any throwing. Or, start a light throwing regimen near the middle to end of the month. This will really vary depending on the individual.
Phase 3 begins where Phase 2 finishes. Depending on your training experience and level of fatigue at the end of Phase 2, you may want to consider a deload or recovery week prior to beginning Phase 3. Younger athletes with less training experience will not need that deload week as much as a ballplayer who has been training for 3-5 years. For the most part though, you need to take your own personal assessment of how you feel and make the call from there.
Off-Season Baseball Strength Program – Phase 3 Overview
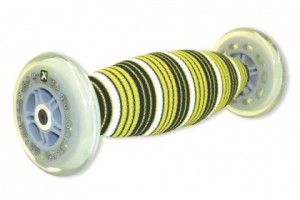
The TP Quadballer is excellent for soft tissue work.
Each training day will include the following segments, and each segment will be done in the order listed:
Foam Roll/Soft Tissue Work
Pre-hab
Dynamic Warm-up
Strength Work
Conditioning
Post-Training Session Static Stretching
Foam Roll
For the purposes of this article and to make a smooth transition from the sample Phase 2 program, a 3-day per week program will be considered. Just remember, depending on the individual athlete and how the program is structured, a baseball off-season strength program can be anywhere from 2-5 days. Also, we have already discussed soft tissue work, pre-hab, and dynamic warm-up protocols in the sample Phase 1 post. So, if you would like to learn more about those aspects of the program, please review them here.
Sample Off-Season Baseball Strength Program – Phase 3
For Phase 3, be sure to train on non-consecutive days. You’ll want to give your body 36-48 hours to recover between training sessions. While the examples below will include conditioning on the same days as lifting, you could perform your baseball conditioning on non-lifting days. For example, if you strength train on Mon/Wed/Fri, you can perform you conditioning after your lifting session on those same days or on Tues/Thurs/Sat. If you decide to complete your lifting and conditioning on opposite days, be sure to have at least one day per week that is devoted completely to recovery. In this example, that would be Sunday. That means no strenuous activity. Either take the entire day off or focus just on soft tissue work and static stretching.
**We understand that you may not be familiar with many of the exercises listed below. A quick search will direct you to videos and explanations that can help you better understand the movements. However, just watching a video will not take the place of a qualified strength and conditioning coach who can demonstrate technique and properly correct form if there are any issues. When in doubt, do not perform the movement. Seek guidance and instruction. If any exercise causes pain, use common sense and do not do it.**
Day 1
Foam Roll
Glutes – 1 x 60 seconds each side
IT Band – 1 x 60 seconds each side
Quads – 1 x 60 seconds each side
Groin – 1 x 60 seconds each side
Hip Flexor/TFL – 1 x 60 seconds each side
Mid/Upper Back – 1 x 60 seconds each side
When foam rolling or completing soft tissue work, be sure to listen to your body. It will tell you if certain areas need more or less focus. You can always spend longer on one area if need be.
Pre-hab
Perform the following movements in a circuit by completing one set of each exercise and then return to the start and complete any movements with additional sets.
The following should take 10-12 minutes to complete. Set up two cones 10-15 yards. Start on one cone and move in the direction of the second. When you complete the required distance for a movement, jog back to the starting cone. Complete each movement deliberately. Do not just go through the motions.
Walking Lunge – 1 x 10 yards
Reverse Lunge with Reach and Lean – 1 x 10 yards
Walking Knee Hugs – 1 x 10 yards
World’s Greatest Stretch with Rotation towards lead leg – 1 x 10 yards
Footwork/Movement Drills
Tall, Lean, and Fall Drill, 5 Yards – 1 each @ 60%, 70%, 80%, and 90% effort
Crossover shuffle in place to 5 yard acceleration – 1 each @ 60%, 70%, 80%, and 90% effort
2 over, 2 back in place to 5 yard acceleration – 1 each @ 60%, 70%, 80%, and 90% effort
Lateral Shuffle – 1 x 10 yards each direction
Strength
Exercises listed below are paired in supersets. Training in supersets means that you will perform one set of the first listed exercise and then one set of the second listed exercise. Take 45-60 seconds of rest and then repeat for the second set of each. Continue this method until all sets in a given superset are completed. Then, move to the next two exercises that are paired together as a superset.
90 Degree Rotational Box Jump – 4 x 3 each
“Hot Feet” Medicine Ball Rotational Chest Pass – 4 x 3 each side
Cable Pallof Press – 2 x 5 each side; 3 sec hold each rep
Reverse Hyper – 2 x 10
Conditioning
Delayed Steal Sprints – With this specific conditioning drill you will get to work on your delayed steal technique while also mixing in some sprint work. Set up three cones – a start cone, a cone at 45 feet, and a cone at 90 feet. Assume the lead off position at the start cone. Pretend the pitcher has started his delivery and take two shuffles toward the second cone. The shuffles should be aggressive and cover as much ground as possible. Upon completion of the second shuffle, turn your hips and sprint. Complete your sprint through the prescribed distance. The first few sets really let you work on your acceleration.
2 x 45 feet – Sprint through the halfway cone and jog it out the remainder of the 90 feet. Walk back to the start cone for rest.
4 x 90 feet – Sprint through the 90 foot mark (not to it). Walk to the start cone for rest.
2 x 45 feet – Complete as described above.
Static Stretching
Hamstrings – 1 x 60 seconds each
Groin – 1 x 60 seconds each
Piriformis Stretch – 1 x 60 seconds each
Hip Flexor Stretch – 1 x 60 seconds each
Calves – 1 x 60 seconds each
Foam Roll
Glutes – 1 x 60 seconds each side
IT Band – 1 x 60 seconds each side
Quads – 1 x 60 seconds each side
Groin – 1 x 60 seconds each side
Hip Flexor/TFL – 1 x 60 seconds each side
Mid/Upper Back – 1 x 60 seconds each side
Day 2
Foam Roll
Glutes – 1 x 60 seconds each side
IT Band – 1 x 60 seconds each side
Quads – 1 x 60 seconds each side
Groin – 1 x 60 seconds each side
Hip Flexor/TFL – 1 x 60 seconds each side
Mid/Upper Back – 1 x 60 seconds each side
Pre-hab
Perform the following movements in a circuit by completing one set of each exercise and then return to the start and complete any movements with additional sets.
1-leg Glute Bridge – 2 x 10 each side, hold last rep 10 seconds
Quadruped Opposites- 2 x 12 each side
90/90 Stretch – 2 x 6 each side
Rhythmic Stabilizations on wall– 2 x 10 seconds each arm
Side Plank – 1 x 60 seconds each side
Dynamic Warm-up
The following should take 10-12 minutes to complete. Unlike previous warm-up routines listed, this particular warm-up is done in place with prescribed reps. You will also need a jump rope. Complete each movement deliberately. Do not just go through the motions.
Jump Rope – 50 Singles
Reverse Lunge with Twist – 1 x 5 reps each
Jump Rope – Footwork, 50 Scissors
Jump Rope – Footwork, 50 Jumping Jacks
World’s Greatest Stretch with twist away from lead leg – 1 x 6 each
Reverse Inch Worms (in place) – 1 x 5
Jump Rope – Footwork, 50 High knees
Lateral Squat – 1 x 10 reps each
Jump Rope – 10-20 Double Unders
Strength
As with Day 1, exercises below are listed as supersets. In one instance, you will see a tri-set. Tri-sets are performed similar to supersets, but instead of two exercises back-to-back, you now have three.
45 Degree Lateral Bound – Continuous – 4 x 6
Rotational Medicine Ball Slam to the Front – 4 x 3 each side
Prone Stability Ball W’s – 3 x 8
Box Squat – 3 x 5
Feet Elevated Push-up – 3 x 10
Dynamic Hip Adductor Stretch – 2 x 8 each side
DB RDL – 3 x 6
Split Squat 1-arm Band Row – 3 x 10 each side
DB Goblet Lateral Lunge on Slideboard– 3 x 6 each side
Build-up Sprints – Build-up sprints start with the baseball player already in motion. In the example below, you will run a total of 60 yards, but only the second 30 yards at 100% effort. Set up cones, use a track, or perform in the outfield. Set up cones at 30 and 60 yards. When you perform the Build-Up sprints, begin your run at 50-75% effort. As you hit the halfway mark, increase your speed to 100% effort.
2 30-yard sprints at 50% effort
6 60-yard Build-Up sprints: first 30 yards at 75% effort, second 30 yards at 100% effort
2 30-yard Build-Up sprints: first 15 yards at 75% effort, second 15 yards at 100% effort
After each sprint, use your walk back to the starting line as your rest.
Static Stretching
Hamstrings – 1 x 60 seconds each
Groin – 1 x 60 seconds each
Piriformis Stretch – 1 x 60 seconds each
Hip Flexor Stretch – 1 x 60 seconds each
Calves – 1 x 60 seconds each
Foam Roll
Glutes – 1 x 60 seconds each side
IT Band – 1 x 60 seconds each side
Quads – 1 x 60 seconds each side
Groin – 1 x 60 seconds each side
Hip Flexor/TFL – 1 x 60 seconds each side
Mid/Upper Back – 1 x 60 seconds each side
Day 3
Foam Roll
Glutes – 1 x 60 seconds each side
IT Band – 1 x 60 seconds each side
Quads – 1 x 60 seconds each side
Groin – 1 x 60 seconds each side
Hip Flexor/TFL – 1 x 60 seconds each side
Mid/Upper Back – 1 x 60 seconds each side
Pre-hab
Perform the following movements in a circuit by completing one set of each exercise and then return to the start and complete any movements with additional sets.
Quadruped Opposites – 2 x 30 second each side
Quadruped Hip Circles – 1 x 10 forward and backward each side
Lateral Squat – 1 x 10 each
TRX W’s – 2 x 12
Standing Rotations – 2 x 8 each side
Dynamic Warm-up
The following should take 10-12 minutes to complete. Set up two cones 10-15 yards. Start on one cone and move in the direction of the second. When you complete the required distance for a movement, jog back to the starting cone. Complete each movement deliberately. Do not just go through the motions.
Reverse Lunge with Reach and Lean- 1 x 10 yards
Quad Stretch with Toe Touch – 1 x 10 yards
World’s Greatest Stretch (twist optional) – 1 x 10 yards
Inch Worms – 1 x 10 yards
Straight Leg March – 1 x 10 yards
Straight Leg Skip – 1 x 10 yards
High Knees – 1 x 10 yards
Butt Kicks – 1 x 10 yards
High Skip – 1 x 10 yards
Lateral Shuffle – 1 x 10 yards each direction
Shuffle, Shuffle, Sprint – 2 x 10 yards each direction – 75% effort
Strength
Again, supersets and tri-sets are utilized similar to Day 2. The final two exercises/movements are listed by by themselves and not together. For the second to last movment, perform the first set, rest for 30-60 seconds, then repeat for the second set. Then, move to the final exercise and perform in the same manner.
90 Degree Rotational Broad Jump – 4 x 3 each direction
Medicine Ball Chest Pass– 4 x (5 x 5)
Rhythmic Stabilization (Throwing Position) – 2 x 10 seconds each – 90/90 position and follow through position
BB Glute Bridge – 3 x 8
Chin-up – 2 x 8, 2 x Max
DB Reverse Lunge to RDL – 3 x 5 each side
TRX Rotational Pull – 3 x 6 each
Wide Stance Anti-Rotation Chop – 2 x 10 each side
Hand March (plank position) – 2 x 20
Conditioning
Lateral Sled Drags – Attach a TRX strap or other handles to a sled. Turn sideways and hold the handle with one hand. Start by driving the knee of your trail leg up and across the front of your body. Drive it back through the ground to move laterally.
6 x 20 yards each direction; rest to full recovery between sets (at least 1-2 minutes, longer if needed)
Static Stretching
Hamstrings – 1 x 60 seconds each
Groin – 1 x 60 seconds each
Piriformis Stretch – 1 x 60 seconds each
Hip Flexor Stretch – 1 x 60 seconds each
Calves – 1 x 60 seconds each
Foam Roll
Glutes – 1 x 60 seconds each side
IT Band – 1 x 60 seconds each side
Quads – 1 x 60 seconds each side
Groin – 1 x 60 seconds each side
Hip Flexor/TFL – 1 x 60 seconds each side
Mid/Upper Back – 1 x 60 seconds each side
Week by Week Progressions
Remember, Phase 3 is one month in duration – 4 weeks. Each week you should be making small adjustments to each exercise so as to change the sets, reps, or weight. Here are some quick guidelines to help you make those progressions.
Power-based exercises such as jumps, bounds, and medicine ball throws should be adjusted minimally. Add one rep in Week 2, another in Week 3. For Week 4, return to the same rep scheme as Week 1.
The deadlift and box squat can be kept at 3 sets of 5 reps each week. Add 5 pounds each week to each lift.
For exercises involving dumbbells (DB) or cables, increase 6 reps to 8, and 8 reps to 10. Keep the weight the same when making these rep increases. After completing a week at 10 reps, return to 6 reps for the exercise, but increase the weight.
For bodyweight exercises such as those that use the TRX or no equipment at all, follow a similar method using 8, 10, and 12 as your rep increments.
Final Words
The sample Phase 3 program outlined above should give you a solid continuation from Phase 2 of your off-season baseball strength program. Phase 3 will continue to progress you to more advanced movements from Phase 2, challenge you a little more in your movement patterns and overall strength, and build upon the foundation of strength, mobility, and stability you have already built in Phases 1 and 2.
If you have any questions, feel free to contact us using the contact page on the menu above.
It’s now the baseball off-season for most levels of baseball – youth, high school, college, and minor league ball. If you are like most ballplayers, you are already thinking about next season and what you need to do over the course of the next 5-6 months to make it the best season of your career. At Baseball Training Methods, we seek out the best information possible in regards to baseball strength and conditioning so that you don’t have to. Below are three articles you should read as you begin your off-season baseball training.
How to Get the Most Out of Your Baseball Offseason Training – There are a few things you need to do in order to set a great foundation for the start of your off-season baseball training program. In this article, Mike Reinold will break down issues you should address prior to starting your off-season strength and conditioning including why you should take time off from throwing, why regeneration is important, and a better approach to rehabilitating lingering injuries.
To Play or Not to Play Multiple Sports? – Should young ballplayers play multiple sports or just baseball? Can playing multiple sports help your development as a baseball player and athlete? In this article over on the Full Windup website, Phil Tognetti looks at the benefits of playing multiple sports throughout the year, and if you only play baseball, what you need to be doing in the off-season to maximize your athleticism and lower the risk of injury.
The Biggest Mistake Pro Baseball Players Make?– While some ballplayers are eager to get right back into the gym when the season ends, in reality, many high school, college, and pro guys look to the fall season as a time to take off for an extended period. In this article, Eric Cressey makes the case for getting back in the gym as soon as possible. It doesn’t necessarily mean you need to lift super heavy and condition until you puke, but at least start the ball rolling on your strength training and your recovery process from the previous season.